> ## Documentation Index
> Fetch the complete documentation index at: https://docs.fjall.io/llms.txt
> Use this file to discover all available pages before exploring further.
# Enable IAM Identity Center
> Enable AWS IAM Identity Center (SSO) to manage team access across Fjall-managed accounts with centralised permissions.
Turn on AWS IAM Identity Center (formerly AWS SSO) to manage user access across environments.
## Prerequisites
* An AWS account with Cost Explorer enabled. See [Enable Cost Explorer](/initial-setup/enable-cost-explorer).
🔗 [Open the Identity Center Console](https://us-east-2.console.aws.amazon.com/singlesignon/home?region=us-east-2)
1. **Click Enable on the welcome screen**
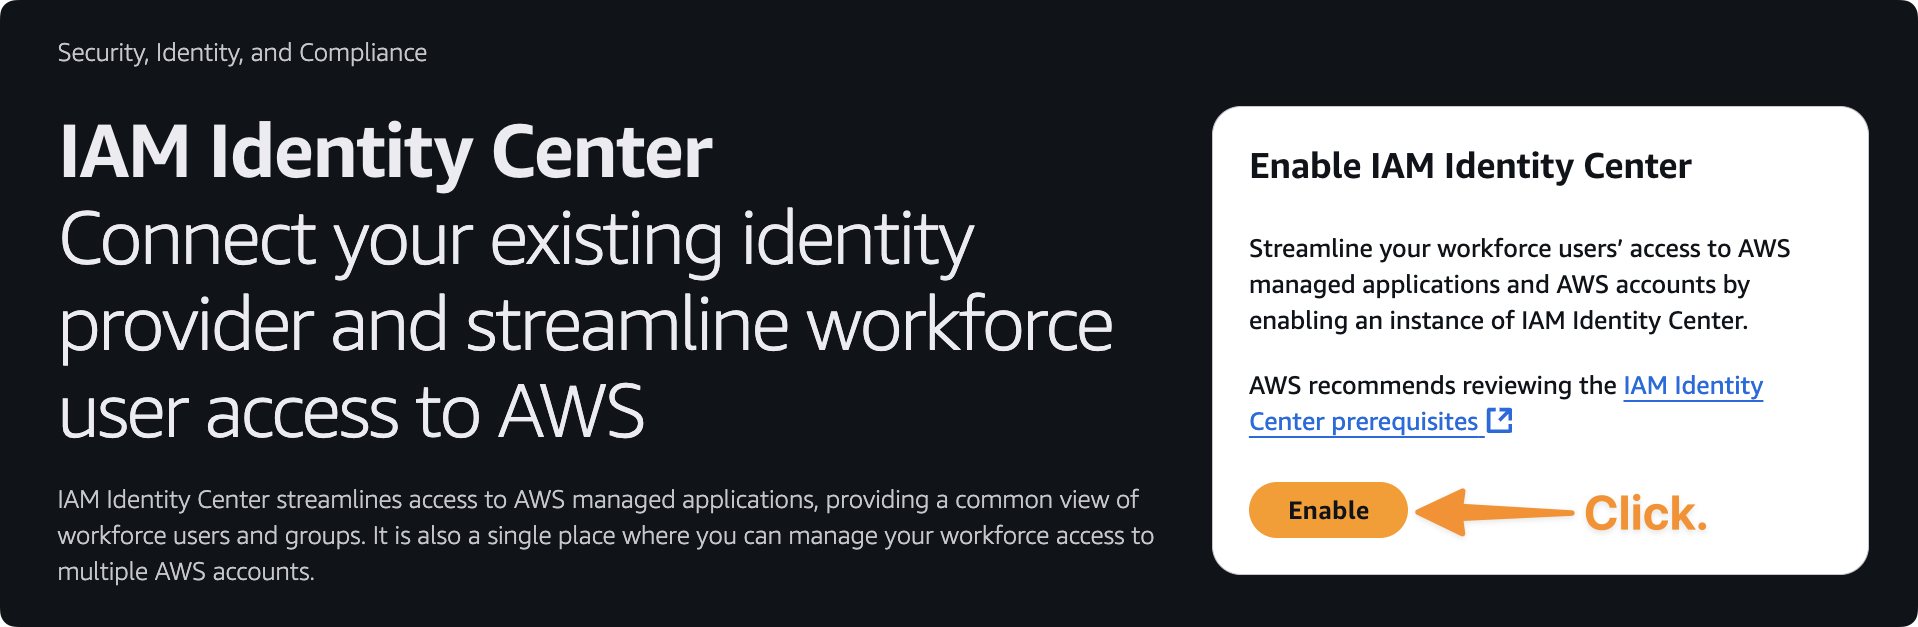 *Figure: Click the **Enable** button to begin Identity Center setup.*
2. **Verify your region**
Check that the region is set to your intended deployment region (e.g. `us-east-2`). If not:
* Click the **Region Selector** at the top right.
* Choose the correct region.
* Click **Enable** again to confirm.
*Figure: Click the **Enable** button to begin Identity Center setup.*
2. **Verify your region**
Check that the region is set to your intended deployment region (e.g. `us-east-2`). If not:
* Click the **Region Selector** at the top right.
* Choose the correct region.
* Click **Enable** again to confirm.
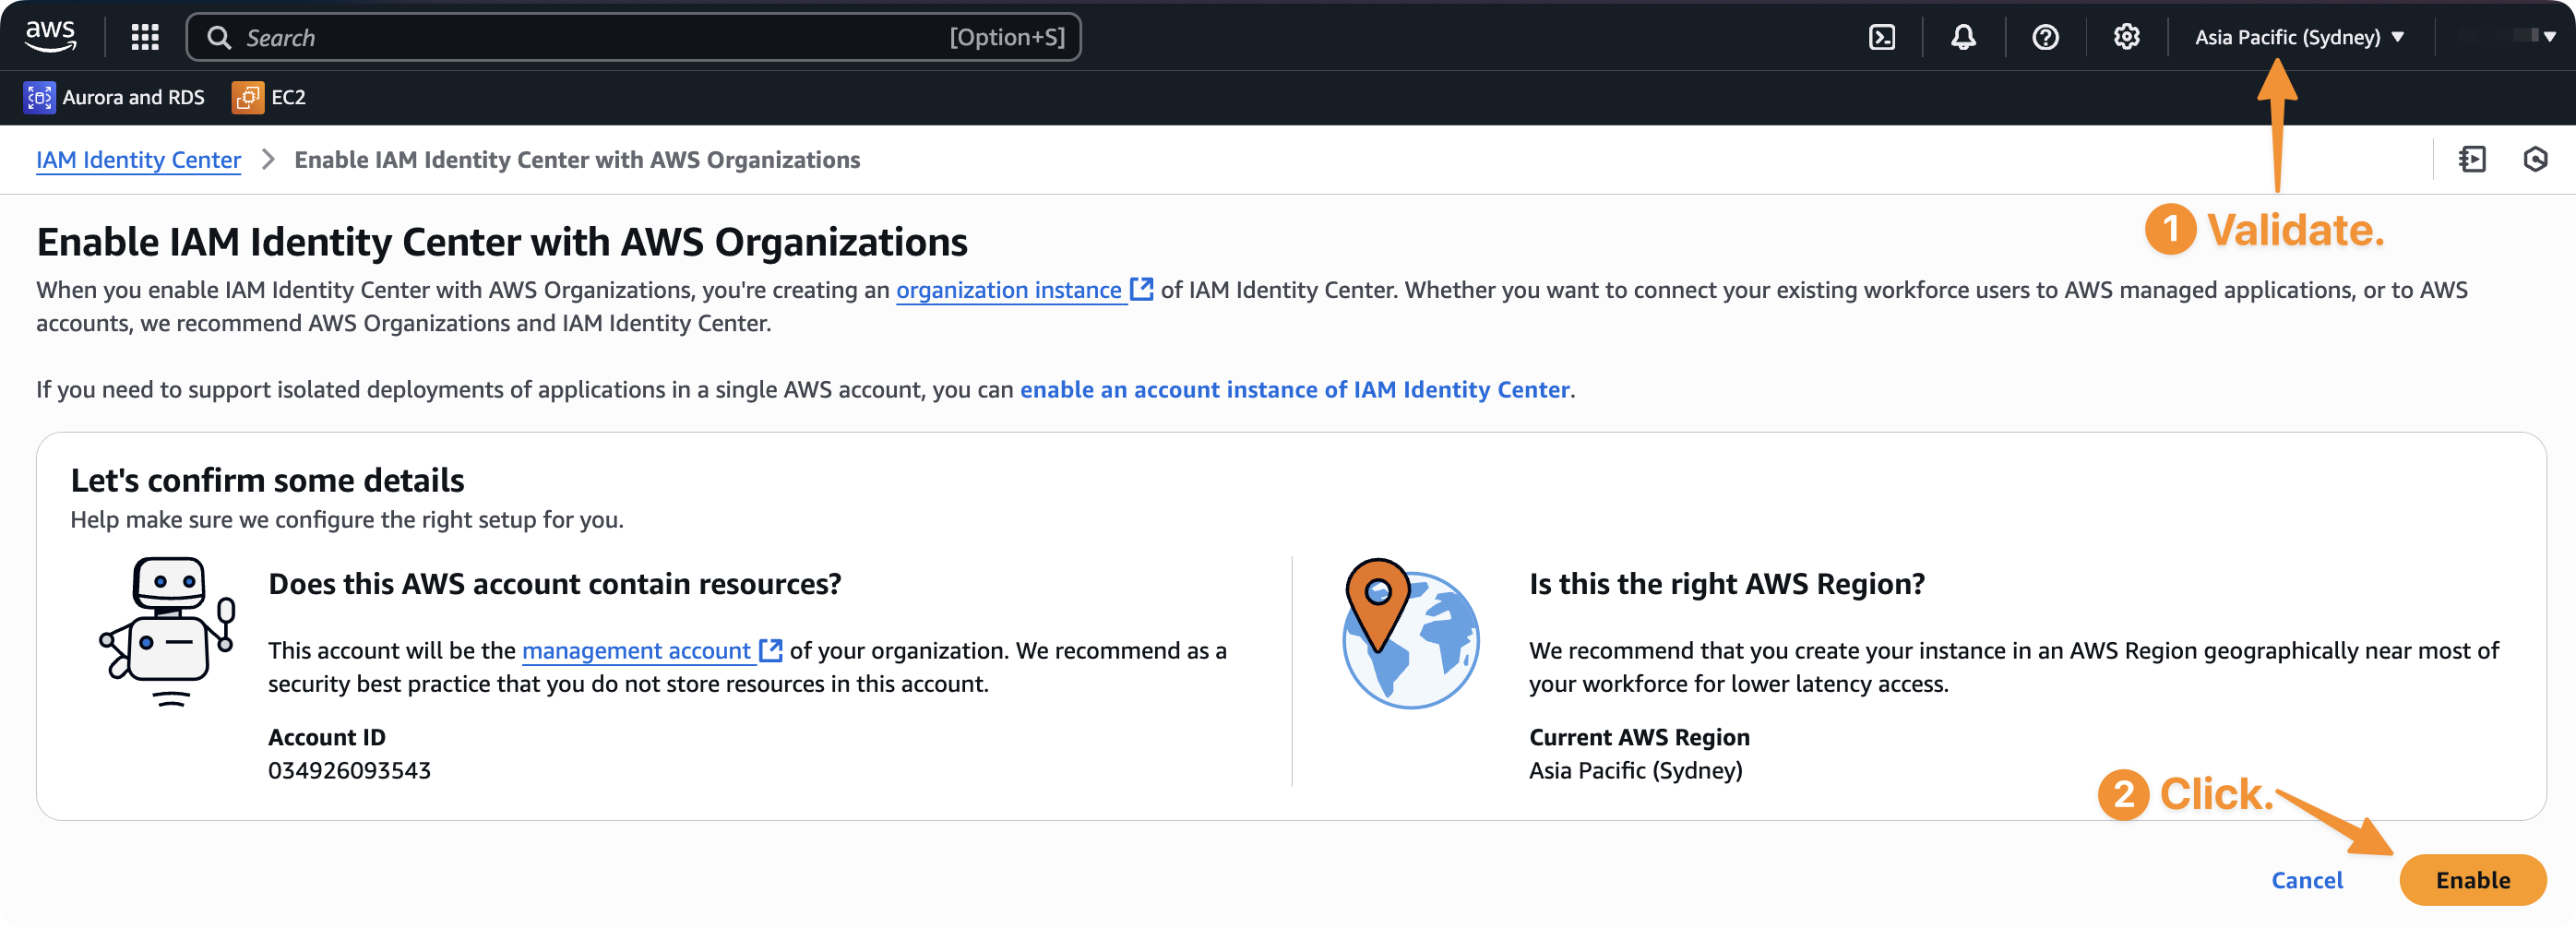 *Figure: Validate and confirm your region.*
Your region selection affects where Identity Center resources are created. Verify this before proceeding.
Using Google Workspace? The CLI can walk the whole enablement, SAML, and
SCIM connection for you: `fjall org identity setup-google`.
## Choose an identity source
Once Identity Center is enabled, decide who owns your user objects — this
becomes the `source` of the `identityCentre` block in your organisation
config:
| Mode | When to use it |
| ----------------- | ----------------------------------------------------------------- |
| `external` | You have Google Workspace, Okta, or Microsoft Entra (recommended) |
| `fjall-managed` | No external IdP — Fjall manages users in the native directory |
| `external-manual` | SAML sign-in without SCIM auto-provisioning |
See [Users and Permissions](/deployment/users-and-permissions) for the config
shapes and day-to-day workflow.
## Next Steps
Set up OIDC or SSO credentials for deploying infrastructure
Create and deploy your AWS organisation
*Figure: Validate and confirm your region.*
Your region selection affects where Identity Center resources are created. Verify this before proceeding.
Using Google Workspace? The CLI can walk the whole enablement, SAML, and
SCIM connection for you: `fjall org identity setup-google`.
## Choose an identity source
Once Identity Center is enabled, decide who owns your user objects — this
becomes the `source` of the `identityCentre` block in your organisation
config:
| Mode | When to use it |
| ----------------- | ----------------------------------------------------------------- |
| `external` | You have Google Workspace, Okta, or Microsoft Entra (recommended) |
| `fjall-managed` | No external IdP — Fjall manages users in the native directory |
| `external-manual` | SAML sign-in without SCIM auto-provisioning |
See [Users and Permissions](/deployment/users-and-permissions) for the config
shapes and day-to-day workflow.
## Next Steps
Set up OIDC or SSO credentials for deploying infrastructure
Create and deploy your AWS organisation