Prerequisites
- Install the Fjall CLI (requires Node 22+)
- Connect your AWS account so the CLI can assume a deployment role
1. Create the organisation
Run the following at the root of your project:2. Answer the prompts
The interactive flow asks for, in order:Use a monitored inbox for the account email. With centralised root access enabled (the default), member accounts hold no root credentials, and AWS root password recovery — the “Allow password recovery” privileged task — delivers its reset link to this address.
npm install.
Creating an organisation does not deploy anything to AWS or open a browser. OIDC trust is established separately by
fjall connect. The flow is create, then connect, then deploy.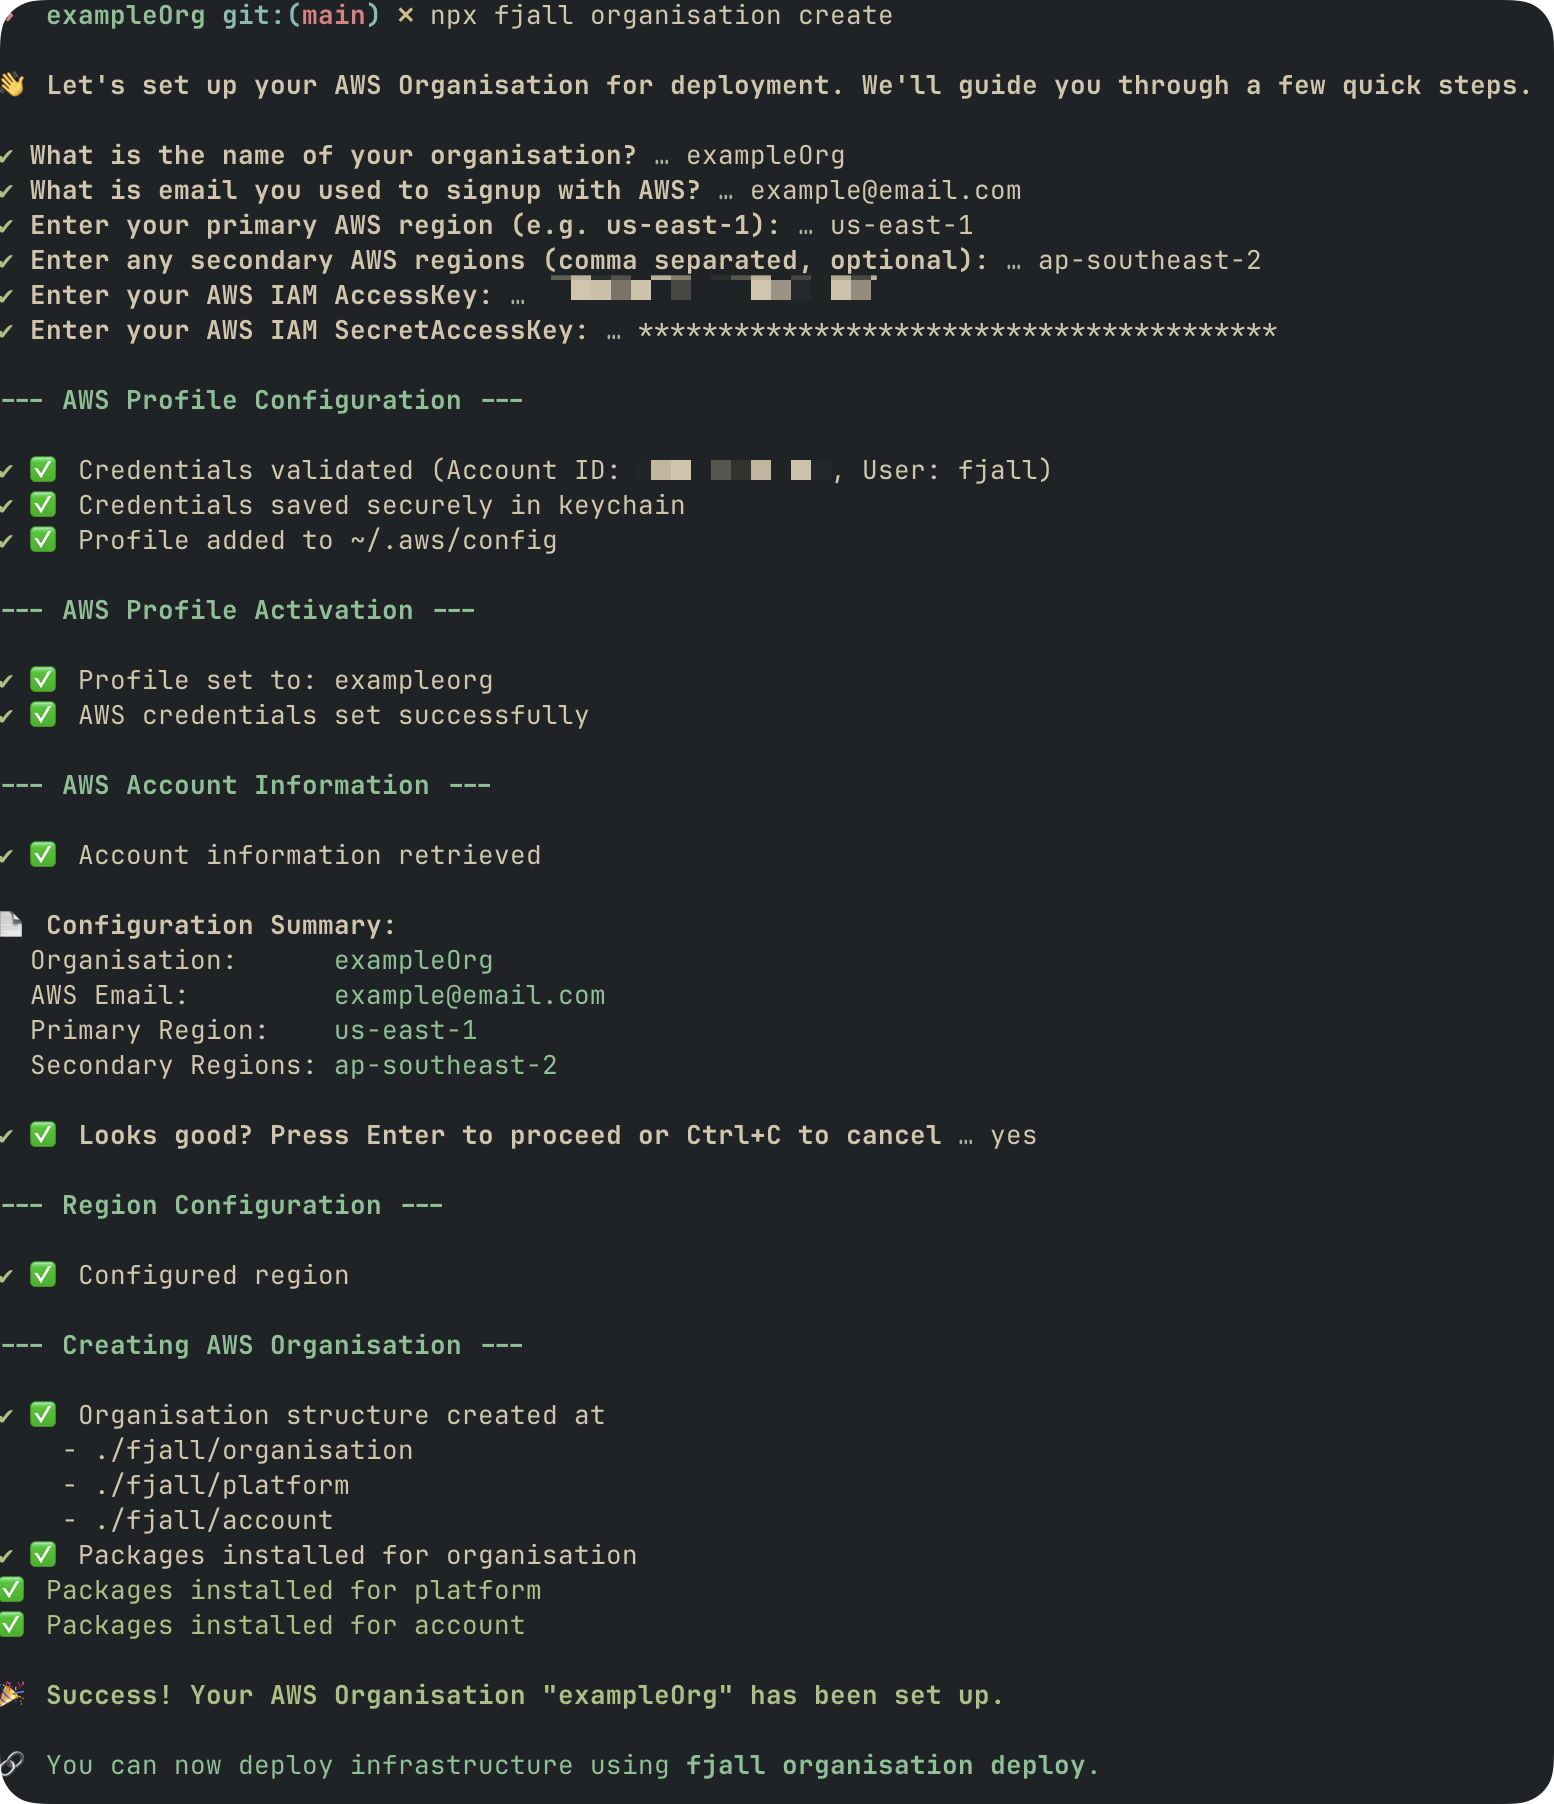
3. Review the infrastructure file
Fjall generates the organisation definition atfjall/organisation/infrastructure.ts.
By default, Fjall generates five accounts (Production, Staging, Development, Platform, and Business Continuity), each mapped to its organisational unit. Edit
infrastructure.ts to change this layout before deploying.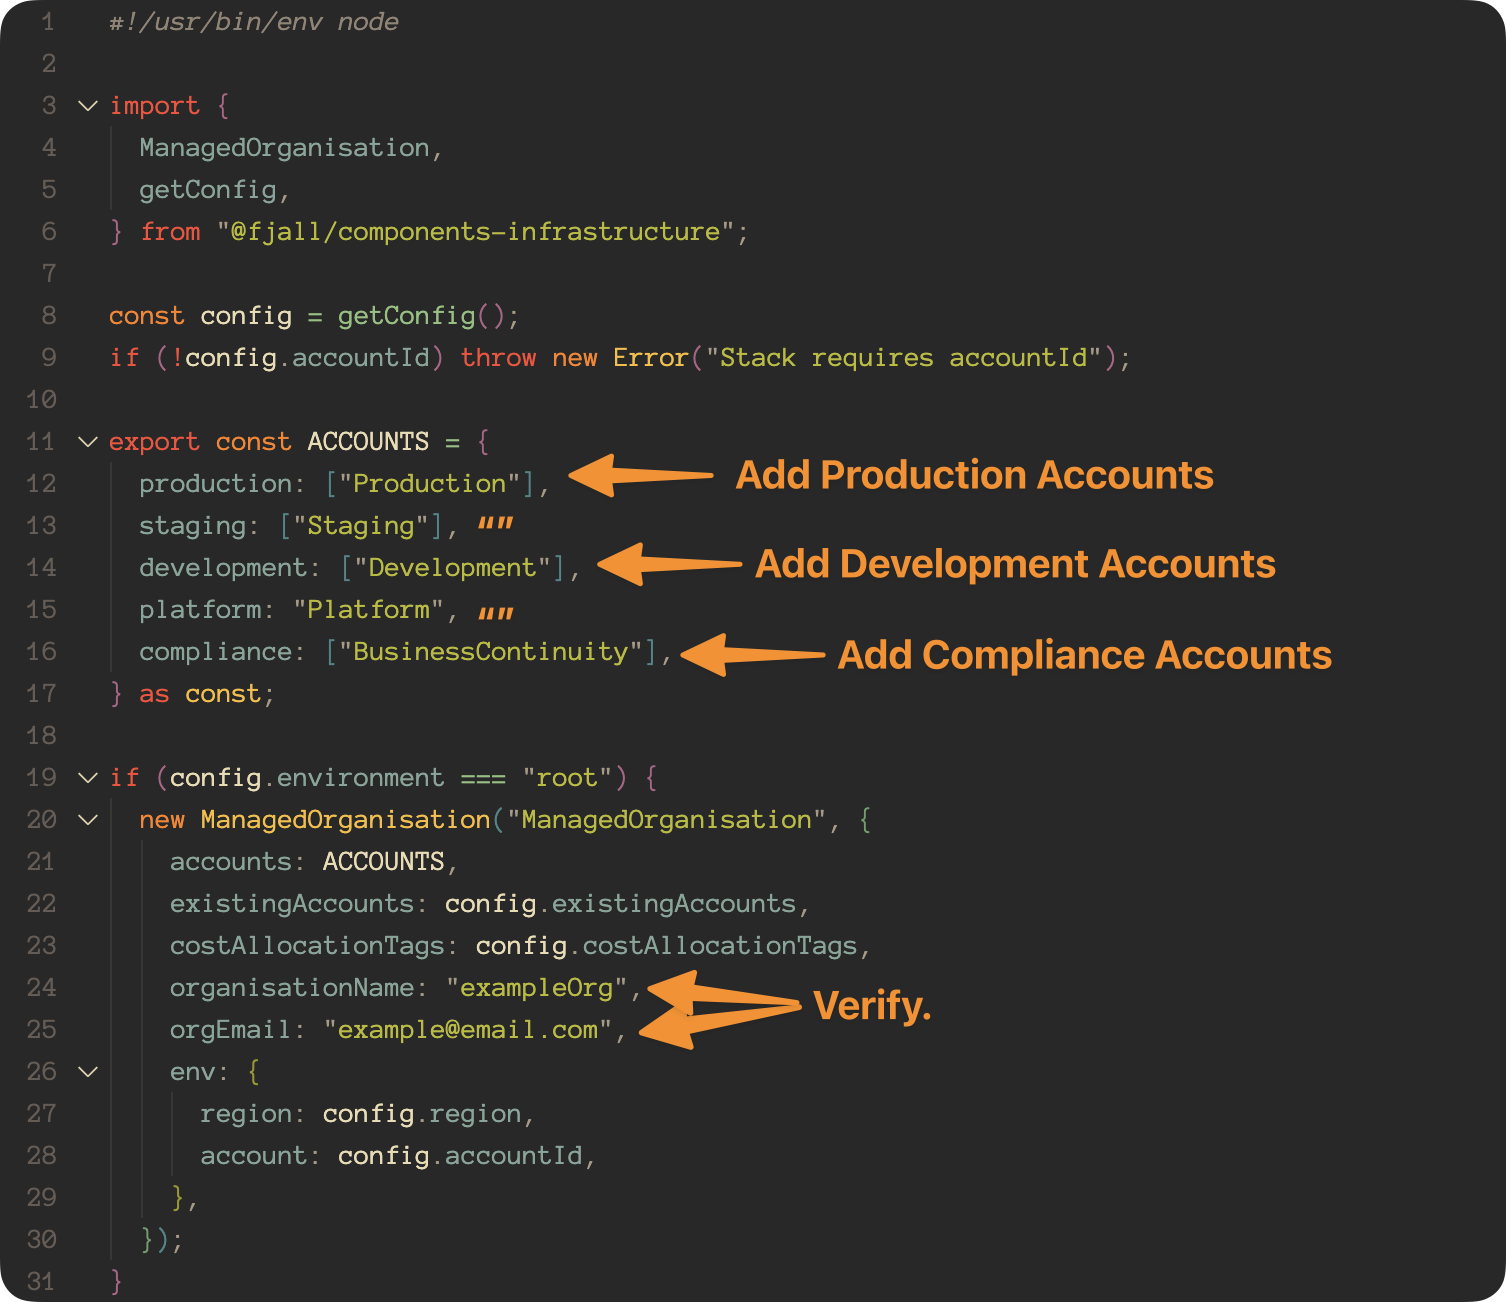
4. Deploy the organisation
fjall target list to see the derived targets and fjall target set <name> to choose the active one.
Deploying organisation cascades into the platform and account deploys by default. Pass --no-cascade to deploy the organisation alone.
Success output
A successful deployment produces output similar to:Non-interactive mode
Pass options to skip the prompts:
The interactive governance labels map to
--security values: Monitored = foundation, Regulated = compliance, Enforced = hardened. Essentials applies no preset.
Next Steps
Understanding Profiles
See how Fjall derives AWS profiles and deployment targets from your organisation config
Connect AWS
Establish OIDC trust between Fjall and your AWS account
Deploy an Application
Deploy your first application into the organisation